
The Art of the Crunch
Crafting the Perfect Golden Cheese Cigars...
How to Prepare Crispy Cheese Cigars at Home: A Gourmet Masterclass
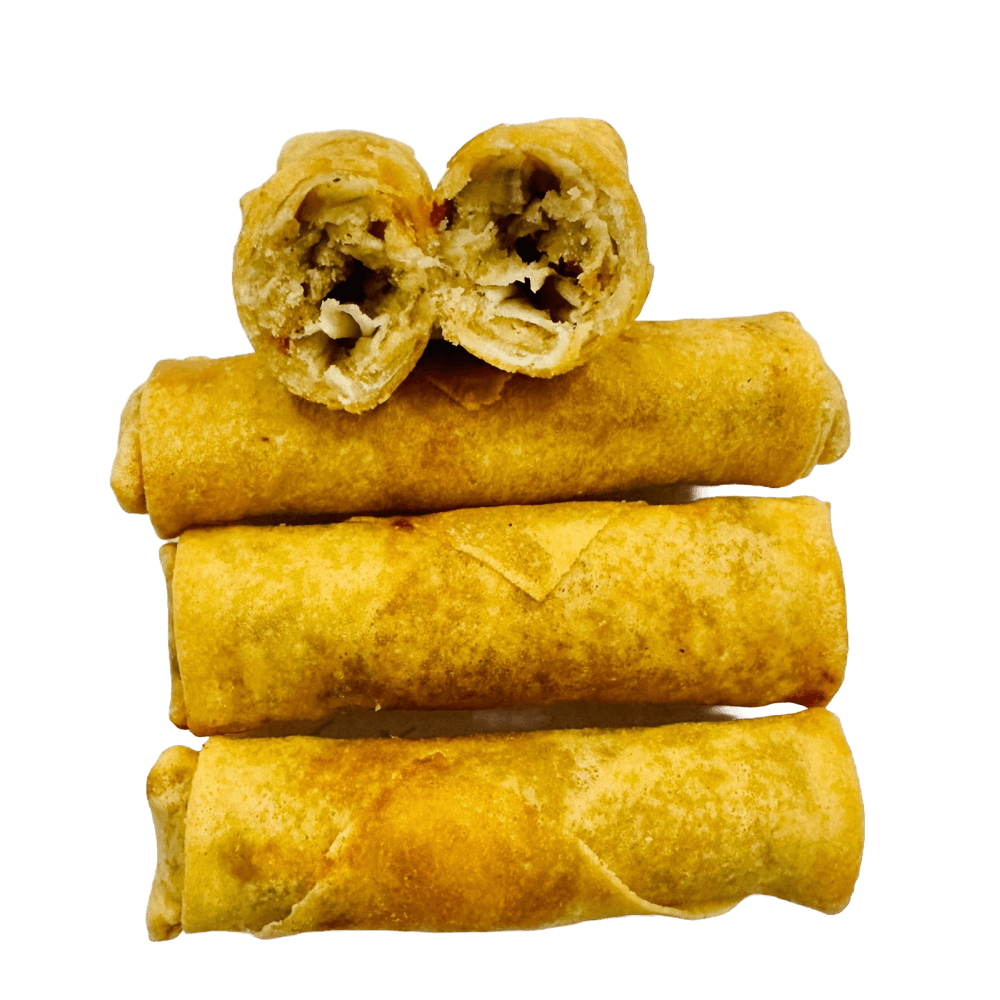
There is an understated brilliance to the perfect structural harmony of a cheese cigar. On the outside, you have a shell so breakable, thin, and brittle that it shatters effortlessly upon your first bite. Inside, a molten, decadent, stringy core of seasoned cheeses yields smoothly to the pressure, filling your palate with rich, savory warmth. Whether known as Middle Eastern Rkakat, Turkish Sigara Böreği, or simply standard cocktail spring rolls, this appetizer stands out as an ultimate global crowd-pleaser.
While many rely on pre-packaged frozen varieties, making cheese cigars completely from scratch in your own kitchen yields an entirely different tier of luxury. Doing it yourself gives you absolute control over the moisture balances, wrapper selection, and customized herbs. In this comprehensive culinary blueprint, we will dissect the kitchen science required to construct flawless cheese cigars that keep their structural integrity without bursting in hot oil.
Understanding the Physics of Melting Cheese
Before grabbing your apron, it is vital to understand the structural dynamics at play inside a frying cheese roll. The single biggest issue home cooks encounter is the dreaded blowout—where the wrapper splits open in the frying oil, allowing the gooey filling to escape, sputter violently, and leave you with hollow, oil-logged wrappers.
This failure happens due to excess water volume. When cheese heats up, its internal moisture content rapidly transforms into steam. If that expanding steam gets trapped inside an tightly sealed environment with nowhere to escape, it builds immense pressure until the pastry wall ruptures. To mitigate this risk, our master filling blend leverages low-moisture cheeses alongside binding elements like starch or egg whites to hold the liquid structural matrix stable while the pastry sets crisp.


Choosing and Preparing Your Wrappers
The secondary foundational element of this appetizer is your outer wrapper. You have three great options available depending on your texture goals:
- Phyllo Pastry: Yields a flaky, layered, ultra-delicate crunch reminiscent of traditional baklava pastry work. Requires gentle handling and frequent brushing with melted butter.
- Spring Roll Pastry Skins: Wheat-based square wraps that deliver a smooth, uniformly glassy, shattered glass style texture. Exceptional for keeping oil out.
- Manti or Samosa Dough Sheets: A slightly thicker homemade flour dough that produces rustic, blistered pastry bubbles for a hearty bite.
The Ultimate Blueprint Ingredient List
To follow along with our master recipe, prepare the following ingredients precisely measured for balanced hydration:
- 16 sheets of Spring Roll pastry or Phyllo dough cut into 6-inch squares.
- 1.5 cups (200g) Mozzarella cheese (Low-Moisture, freshly grated).
- 1 cup (150g) Feta or Paneer cheese (crumbled fine to add salty body).
- 0.5 cup (60g) Cheddar or Gouda cheese (for sharp flavor depth).
- 1 tbsp Cornstarch (our secret moisture-binding shield).
- 2 tbsp Fresh flat-leaf parsley or mint (finely chopped).
- 1 pinch Freshly cracked black pepper and a touch of red chili flakes.
- 1 egg white beaten thoroughly with 1 tbsp of water (the edible construction glue).
- Neutral high-smoke oil for frying (such as peanut, canola, or corn oil).
Step-by-Step Assembly Instructions
1. Building the Inner Core Mixture
In a large mixing bowl, combine your grated low-moisture Mozzarella, sharp Cheddar, and crumbled salty Feta. Use a fork to work the cheeses together until uniform. Sprinkle the tablespoon of cornstarch evenly across the mixture, followed by your chopped parsley and pepper spices. Toss well. The cornstarch acts as a thermal buffer, binding any escaping liquids as the cheese reaches its melting point.
2. Geometric Rolling & Sealing Strategy
Lay down one sheet of wrapper on a dry cutting board, keeping its sharp points oriented like a diamond facing you. Place roughly 1.5 tablespoons of your dry cheese blend onto the lower third quadrant of the wrap. Gently shape the pile into a neat log horizontally, ensuring at least an inch of clearance remains on the left and right outer margins.
Lift up the bottom corner point closest to you and fold it cleanly over the cheese cylinder, rolling upward firmly once to lock it in place. Next, fold both the left and right outer wing flaps straight toward the center axis line. This creates a secure envelope wrap that halts lateral seepage. Continue rolling upward tightly toward the top point. Right before reaching the edge, dip your finger or a pastry brush into the prepared egg white wash and paint the top triangle point. Finish rolling over the wash to seal the cigar shut down its seam.
3. The Thermal Cooking Execution
Pour at least two to three inches of neutral high-heat frying oil into a heavy-bottomed Dutch oven or deep skillet. Bring your cooking oil up to a steady temperature range of 350°F to 365°F (175°C to 185°C). Keeping this temperature steady is critical: if your oil is too cold, the pastry absorbs grease and turns soggy; if it is too hot, the wrapper burns before the cheese center shifts into a liquid state.
Gently lower your cheese cigars seam-side down into the hot oil in modest batches. Avoid overcrowding the pan, which rapidly drops oil temperatures. Fry for roughly 3 to 4 minutes, rolling them over using tongs until they reach a uniform, stunning golden-brown color profile. Immediately transfer them onto an elevated wire rack lined with paper towels to drain excess fat cleanly away.
Pro Tips for Making Ahead and Storage
If you want to prepare these ahead for an upcoming party, cheese cigars freeze exceptionally well when raw. Lay the assembled, uncooked rolled logs in a single layer flat across a baking sheet lined with parchment paper, taking care that they do not touch. Slide the tray directly into your freezer for two hours until completely hard. Once frozen solid, gather the logs and store them safely inside a heavy-duty ziplock bag for up to three months.
When you are ready to serve, do not thaw them. Fry them straight out of the freezer in 350°F oil, adding an extra 60 to 90 seconds of total cooking time to ensure the deep interior frost cooks through entirely to a rich melt. Serve your finished hot cheese cigars alongside a refreshing dipping companion like hot honey, sweet chili jam, or a classic garlic yogurt sauce to offset the decadent rich profile of the cheese.



0 Comments